Showing posts with label DIY. Show all posts

Wednesday, September 17, 2014

Whimsical Wednesdays- I say Capt'n, now buy a flow'r off a poor girl

Hello everyone! It's certainly been a while now hasn't it?
Today, I was preparing some party favours for a doe party and the party's theme was regency time period. Think Pride and Prejudice and any Jane Austen novel/movie.

Regency = old times in England, ladies had governesses and men went to Eton. Pretty fancy in my opinion. I was really cracking my head over what kind of party favours to prepare and then I chanced upon this:

Not exactly recency period, but I'm pretty sure flowers were sold by poor children and the well off people would sometimes buy a small posy of flowers out of whim.

I thought it would be a good idea to give my guests cute little posies of flowers and roses was a very popular flower during the regency period because creating hybrid roses was considered a 'sport' back then and people would try to breed as many different kinds of roses.


The idea was just too cute and there is a shop near my home, which sells beautiful fake flowers for a good price.


They actually sold foam type fake flowers, which I chose over plastic and satin because they look much better compared to satin and plastic.

 Foam flowers also have this kind texture which is not as stiff as plastic yet not as soft as satin which makes it keep its form better yet still look soft.

They have a kind of natural look to them and from far away, I think they look pretty realistic :)


The stems were thin and soft wires which were easy to manipulate, but once bunched up, it made a pretty sturdy stem.

Before wrapping with florist tape
After wrapping with florist tape
Wrapping the stems with florist tape (which the store also sold) gave the posies a more polished finish as well as to prevent people from getting poked by the thin wires


 I realised much later on that I probably should not have tied the ribbon before wrapping the florist tape but, I guess it's preference.


After that I decorated each posy with organza cloth and ribbons to make it all girly and pretty. Initially, I was going to make them all the same, but then I couldn't decide how to decorate it. In the end, each posy has a different pattern. Haha!


Now pop them in a wicker basket for that rustic look and you're all set to go!

Personally, if I got flowers as a gift, I wouldn't know what to do with them, but I hope my guest like it.


Asia Colion

Friday, September 5, 2014

Funtastic Fridays - Life's like a box of chocolates...

It's Friday! I have never appreciated Friday as much as I have today.
The quote "Life is like a box of chocolates, you never know what you'll get" from Forrest Gump the movie,
rings true for me today. I never knew that you can do something that you like and still feel so tired.

I would like to think that I worked hard this week and now it's time for some pampering!

Cue music, rockabilly time!


Nothing as pampering as a good self pedicure session! I personally feel that I neglect my feet a lot despite all the hard work they have to do with making me mobile.

Especially when I used to go for ballet classes... the abuse I put my feet through (shudders)
Inside our pretty little ballet slippers is probably a pair of feet uglier than average feet

The thing about doing pedicures for me is that , I have really tiny toenails (or nails in general)
Check out my cute feeties! (I'm being sarcastic, I know it looks terrible.)
Going to a nail salon to do manicures and pedicures are an absolute waste of money, especially if they only have options for painting nails. What my feet really need is to be rid of callouses and dead skin cells (and an exfoliation would be nice)

A lot of my friends ask me what I do with my free time, I usually just tell them I read books, but I'm actually watching cat videos on the internet! HAHA!!

I may be Kidding,  I do read books, but I also watch cat videos online and sometimes, I chance upon really....interesting stuff, which I end up reacting like this: YEEERRR!! SO CUTE ONE!!!


Yup, so, now you know what I do with my free time.

I'm off to enjoy the rest of my funtastic friday~
Let me know what you do during your free time in the comments section !
Asia Colion

Thursday, August 28, 2014

Funtastic Fridays- Favorite things


It's Friday again! What better way to start of the day than to have your favorite breakfast food?
I don't really have a favorite breakfast food. It's a game of roulette in my brain minutes before I wake up and whatever food on the list gets chosen will be The Favored Breakfast of The Day.
Today's Favored Breakfast of The Day: Over peppered sunny side up egg and cheese sandwich
I could only capture my over peppered (I love pepper) egg because I was so hungry I ate my sandwich immediately after I assembled it. (You're not really missing out much, it didn't look that great anyway. Neither does my egg)

Other than sunny side egg and cheese sandwich, I love ICE-CREAM, but I love HOMEMADE ICE-CREAM even more!

Do I even need to tell you how much more delicious homemade ice-cream is compared to commercially made ones? OF COURSE NOT!

However, I found this ice-cream pre-mix in my local baking shop and I was really mindblown...I never knew they had such things, but I realised that this is probably how ice-cream is made commercially as an afterthought. Pretty disappointing, I know.
This pre-mix just lost it's mindblowing magic
Despite the fact that this recipe only calls for two ingredients (Full cream milk and the ice-cream mix), It requires too much fancy baking equipment. Weighing out ingredients like milk in grams....seriously? Come on!
It was a tad bit too sweet, so I added in some green tea powder to neutralize the  sweetness that's why it looks green.The flavour being too sweet would be another drawback about using ice-cream mix

Before
After  
I let it soften a bit before transfering to a freezer box for storing


Scoop, serve and enjoy!

P.s It's not as good as I thought it would be, I should expect that since it is a pre-mix. Still, this feeling of unsatisfied-ness is just so annoying!

I'm probably gonna make ice cream from scratch some time soon.

So, what is your favorite food? Let me know in the comments section!
I''ll be going off to enjoy the rest of my Friday. Ciao~

Asia Colion

Thursday, August 21, 2014

Funtastic Fridays - Scrumptious Scones

TGIF! 
Thank God it's Funday!
I am happy to announce that Funtastic Fridays are back!
And this week. it's....(drumrolls)...
Now, doesn't that just look scrumptious?
Scones! (ba-dam-tss!)

Here's how these babies were born!

This recipe was adapted from http://allrecipes.com/recipe/scones/

Ingredients (Listed from left to right, top to bottom)

  •  1 cup milk
  • 3 cups flour
  • 170 g unsalted butter, cubed (and kept as cold as possible, freeze it)
  • 5 teaspoons of baking powder
  • 1/2 cup of sugar
  • 1/2 teaspoon of salt (I used Himalayan rock salt, but you can use regular salt)
  • 1 egg, beaten lightly
BUT WAIT, THERE'S MORE!

Before you jump right in, here's some thing's you must should do(trust me on this one, I learnt the hard way):

1) Put what ever bowl you're using to mix in the fridge/ freezer and let it become nice and cold
  • This will help the scones rise better by keeping your mixture (especially in warm climates)
2) Freeze your butter after you've cubed them
  • Because you need to keep thing cold, so your scones rise higher
3) Preheat your oven at 200C degrees
  • Grease your baking tray or line it with baking paper
4) Clear a large enough surface for kneading the flour
  • Finally, some action!
5) Make sure your hands are clean and your fingernails trimmed
  • Obviously, for hygiene reasons. Especially trimming nails...
Let's get on with the show!

1) Place flour, sugar, baking powder and salt into the cold mixing bowl and mix till combined


2) Throw in the cubed butter and, using your hands (you can use a pastry cutter but I like using my hands) break up the butter and mix with the flour until a bread crumb texture is achieved.

Your mix should look like this (this step is totally not long nailed friendly, hence, trim them)


3) Pour milk into the beaten egg and mix till combined


4) Make a well in the mix and pour milk and egg mixture into the well. Mix until you get a gooey mess.

  • At this point you might think the gooey mess is a mistake, but DON'T PANIC! It's all part of the plan.


5) Flour your surface generously, much more generously than I did please!

Gooey mess FTW!

6) Scoop out the gooey mess onto the floured surface and knead away!


7) Feel free to add more flour as you knead and shape it into 1 and a 1/2 inch (approximate) and you're ready to cut

8) You can use a scone cutter but if you don't a straight glass will do the trick! Flour the cup thoroughly and press down into the flour to create round cuts!
  • Optional: egg wash, use a basting brush to brush on beaten egg onto the top of the  unbaked scones


9) Pop them into the oven and bake for 15-20 minutes or until golden brown. Cool on a wire rack.
Why, hello there! Nice day for a spot of tea!

10) Serve with butter and jam (and clotted cream if it's available!) And now you're done!

Once more this recipe is adapted from http://allrecipes.com/recipe/scones/
I used this recipe and made changes as I saw fit.

Enjoy!

Asia Colion

Monday, September 23, 2013

Munching Mondays - Soya beans and meat replacing

I'm not a vegetarian but I do go vegetarian for one week in a month (sometimes I eat meat during that week  because I'm not that disciplined but mostly veggies are eaten)

I don't do this for health reasons. I'm healthy-ish and have no allergies to dairy or gluten product. It's just an excuse for me to eat more veggies because, have I ever mentioned that I love veggies? I LOVE THEM!

However, vegetarian food available in Malaysia has imitation meat which contains a lot of flavoring and additives to give it a similar taste of meat.Not to mention can sometime be very overpriced.

 No offense to vegetarians, but I'm honestly and sincerely confused as to why you eat imitation meat? Could someone please enlighten this poor uncultured soul?

Moving on, so I usually eat tofu and eggs to sub proteins but recently, I came across a bag of dried soya beans. I bought it thinking I would make soya milk (which I will) but it's really rather a lot of soya beans.

And then it hit me! I could use soya beans as a protein substitute as well! Thus this blog post was born (fanfares and grand music!)
To use dry soya beans, you need to re-hydrate them by soaking them for 8 hours at least. I just soaked them overnight. Pop them into a bowl with enough water to cover two times the amount of soya beans and say goodnight.

 The next day, your soya beans should look like the one on the right (double the size). The one on the left is a dry bean.
 I wanted to use these beans as minced meat so i gave them a little roast in the over for about 10 minutes to get that chewy meat texture
Pop them into a grinder and.....
Voila! soya bean pulp. Now go and do what ever you want with it. Search for recipe's using soy bean pulp or okara.

I think I'll use this to make okara cookies next time!

Asia Colion

Monday, September 16, 2013

Munching Mondays- Garlic smelling hands

I really have an insane craving for mac and cheese now but I only have healthy food with me. Hence, I will have a healthy dinner TOMORROW! (Procrastinators unite!)

So, my hands smell like garlic and I find that rather yucky but at least I won't have to cut garlic for a long time. Why ?

The trick for cooking which I use to reduce my cooking time is to pre-chop my garlic and store them in cooking oil then put it in the fridge.

It's completely safe! I have been doing this for the whole of my previous semester and I did not have any stomach discomfort nor did Sienna. (My ex-roomie and the person with the lacy purple scarf)

After all you only need two things: Garlic and oil (prefably not olive because you can't heat olive oil  too much or it will be bad for your health.) I used vegetable oil(Palm oil, I think.)

How I did it?

  1. Crush and peel garlic
  2.  Chop garlic finely
  3. Put in an air tight glass jar (or clean old pasta sauce bottles)
  4. Fill jar with oil till you cover the garlic
  5. Put in fridge

As you can see the oil solidifies. This is completely normal and a good thing! Reason?
You can  now control the amount of oil you use without accidentally pouring out too much into the pan while cooking.

You also get Garlic infuse oil. How do we use it now that we have a jar full of garlic in oil? (and garlic smelling hands)

  1. Grab a spoon
  2. Scoop out the amount of oil garlic mixture
  3. Drop into warm pan 
  4. Fry garlic till golden brown
  5. Stir fry vegetable/meat
    or
  6. Put the oil  and fried garlic into a bowl and add in some soy sauce for a simple dressing


Hope you found this tip useful :)

Asia Colion


Wednesday, September 11, 2013

Wooly Wednesdays - Crochet shoes?

Now that Andy's scarf is done my next project seems rather ambitious but oh so pretty! I can't help myself.
I think, like most girls I have a weakness for pretty feminine things.
Super pretty and feminine!
Really excited about this. I hope to be able to come up with an outdoor version. I mean come on! These are waaaay too pretty to be worn around the house. Any normal  crochet-er/knitter would wanna show off this handy work! Honestly, it deserves to be shown off!

Or perhaps something less ambitious like barefoot sandals although I have no use for them other than for aesthetic reasons

Aren't these just gorgeous?! I don't know who made these but they are so talented!
Choices, choices. I can't decide. Which one do you think I should attempt?

Asia Colion

Wednesday, September 4, 2013

Wooly Wednesdays - Andy's scarf

Still working on Andy's scarf this week. This one is probably going to be the last post about it because I have to finish and present it to him before he leaves.

Okay, I'll be honest, I have been slacking off on the scarf (Andy, if you're reading this, I'm sorry!) coupled with work from my internship, packing up things for the beginning of my semester in Unicorn and preparing to move things from house to house, falling sick (I sound like a very sexy frog, if frogs talk) and blogging preparing for my first time ever worship leading. It's been pretty hard to keep up with the scarf.

Has grown twice it's  length since last Wednesday!
Enough of my groaning and moaning. I was thinking of sewing an extra felt lining to cover up the back of the scarf this will make it nice and toasty for cold weathers since acrylic yarn isn't the warmest thing for making a scarf with. It's going to look so fabulous!

See how the back has those tiny running lines along the top right diagonal? Gonna hide those!
People will spot Andy from miles away and they will call him, the guy with the checkered scarf and everybody will know that the guy with the checkered scarf is Andy. 

My mission would then be accomplished. What's my mission? Well, it's to make conversational pieces of work (scarf in this case) which people will talk about and recognize from miles away.

Well, Andy, better be prepared for all the attention the girls gonna give ya, I hope you like it! ;)


 Asia Colion


Monday, September 2, 2013

Munching Mondays - Meal planning (mp) week 1 execution!

This is going to be my first meal plan ever. Join in my quest to healthier and convenient eating. If you're too busy to do it yourself you could use mine but I eat a lot of food (especially veggies) that people dislike.

Tada! So this is my meal plan for lunches

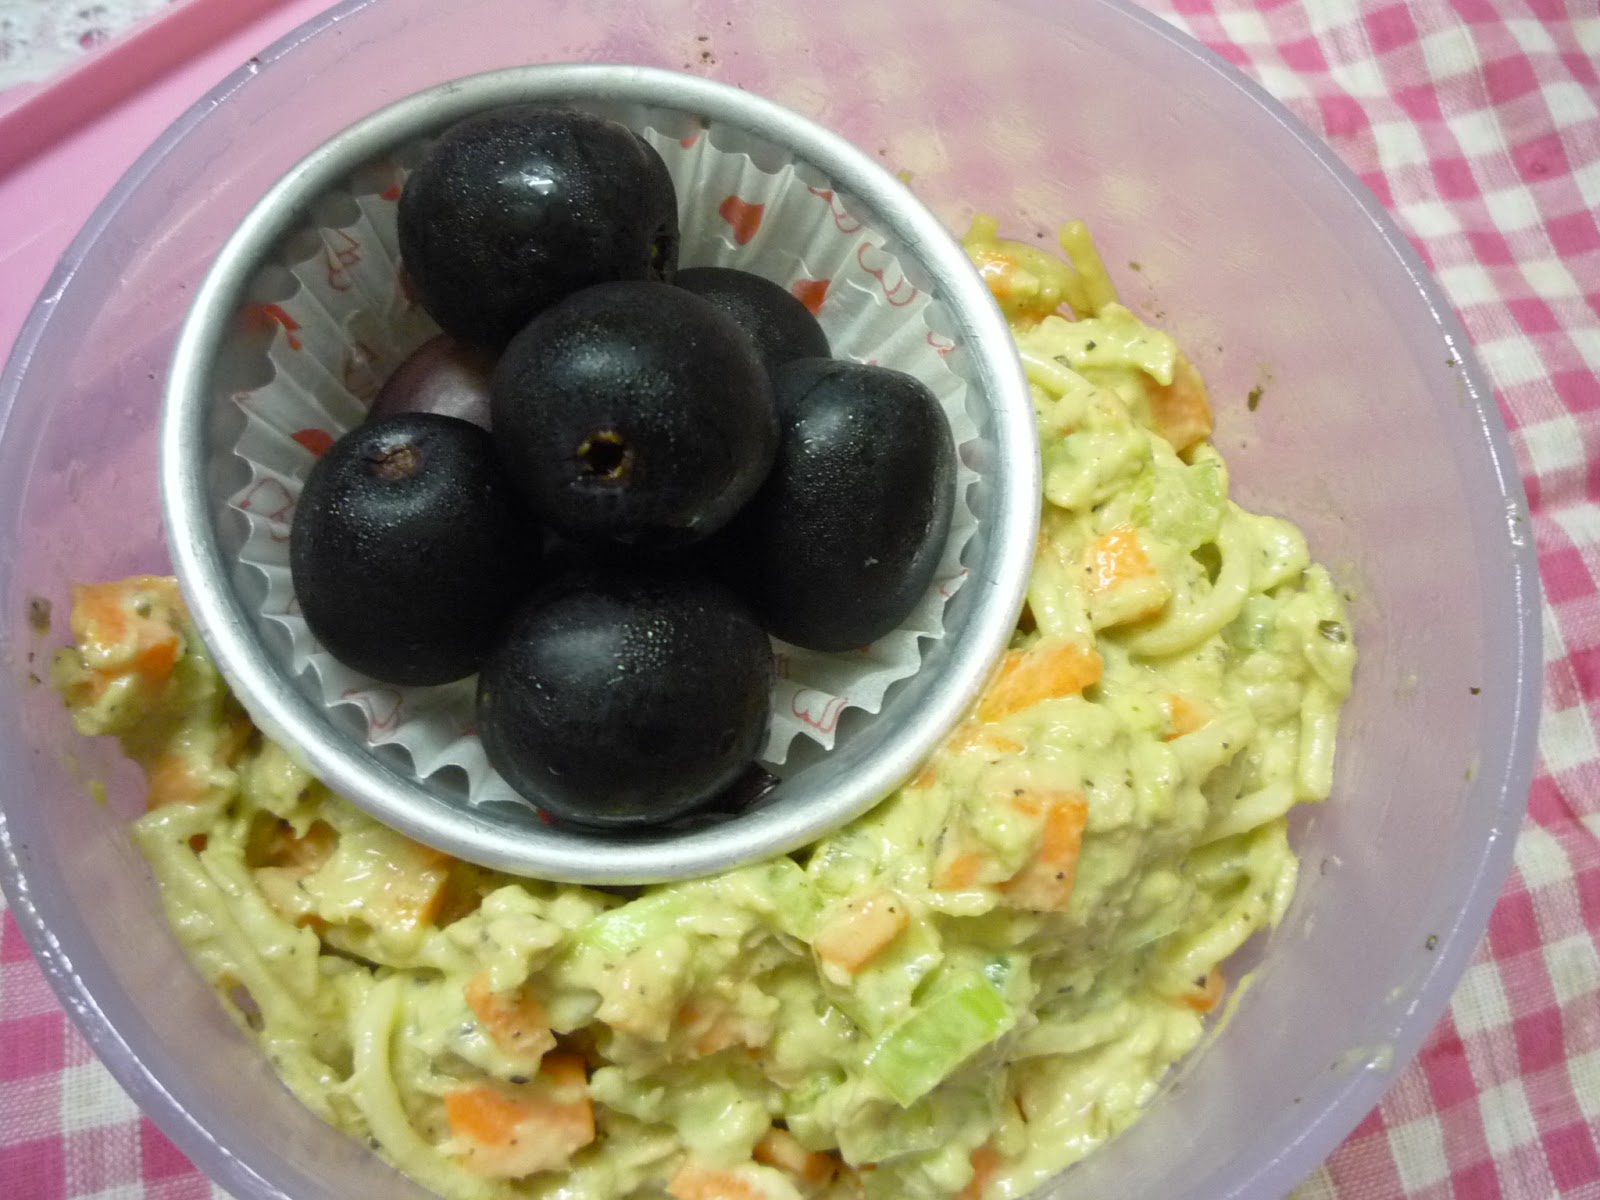
Avocado Tuna pasta salad with grapes!

And an up close
It probably doesn't look particularly nice now but I can assure you, it was really tasty. What's more, it was so easy to make! What's not to love? :)
The only hard part was waiting for lunch time to come (I prepared this before going to work) :D
Leave me a comment on how you like your pasta. See next post!

Asia Colion

Friday, August 30, 2013

Funtastic Fridays - No bake cake ( batik cake/ hedgehog slice)

Warning! This post is ultra long. Warning! This post is ultra long. Warning!

Everybody loves Friday except for everyone else who doesn't (me included). Why would anyone n dislike Fridays? Well in Malaysia, Friday is the day of terrible traffic because of several factors. 

Malaysian traffic often looks like this or worse.
Going chronologically: 
  • 'Overly happy because it's the last day  of work for the week' workers heading off to work in the morning. ( Fine, this occurs every day minus the happy part.)
  • Our Muslim friends have prayers in the afternoon = traffic jam. (You guys face the worst of it because you have to go out to pray. Sorry bout the jams :/ )
  • Friday night fever people (All you crazy happening people who go out after work to partay the night away)
So obviously for all us spoil sport people who don't like Friday jams, we need a little Friday fun! What better way to have fun than to eat a deliciously rich  and fudgy chocolate cake and decline into obesity?
This is Wendyinkk's batik cake! So pretty! You have to check out Wendyinkk's blog tutorial, it's much clearer!

 I am fully aware that some people dislike chocolate but this one's for the rest of us who do.

Making cakes = The hassle of  baking a cake and the clean up that comes with it and let's admit it, there are those cakes which turn out like an alien baby from Uranus or something. 

I've probably convincingly discouraged you from trying by now. But fear not!! This no bake batik cake/hedgehog slice  is so SIMPLE and FAIL PROOF. You will NOT end up with an alien baby from Uranus. I promise!

Okay  enough chatter and down to getting this cake in our tummies! (There are a lot of different versions of this recipe on the web, mine is reduced sweetness so it's quite bitter)

Things you need:
  1. Measuring cups (if you don't have these, using a small glass cup might work)
  2. Baking paper ( or you can grease your container with butter/margarine)
  3. Container of any shape to house your cake (usually square ones are good)
  4. Pot and stove (if you don't have this, you probably can't make this cake...)
Ingredients ( My recipe is reduced sugar ):
  1. 1 cup of water (250 ml)
  2. 1 cup of cocoa powder
  3. 1/2 to 1 cup of Milo/ drinking chocolate powder
  4. 1/2 cups of brown sugar (if you like things sweet you can use 1 cup)
  5. 125 g of butter/ margarine ( Roughly half a stick. Salted/ unsalted? Up to you.)
  6. 3 eggs
  7. 1 pkt of Marie Biscuits
Method (read to the end before doing anything):

  1. Put ingredients 1,2,3,4 in a pot on low heat. Mix until combined.
  2. Add in ingredients 5 and 6 in the same pot and stir until chocolate sauce coats your spoon. Turn heat off

    For people who want a nice even pattern or if you just have OCD and need things to be neat:
  3. Arrange a layer of Marie biscuit to cover the base of your container
  4. Pour chocolate sauce to cover the biscuits. Now add another layer of biscuits and repeat this process till you finish your chocolate sauce. 
  5. Now proceed to step 8

    Alternately, if doing step 3 and 4 is too much of a hassle for you non-OCD folks:
  6. Simply break the Marie biscuits into halves or quarters (or just break those buggers anyhow) and chuck it all into the chocolate sauce.
  7. Stir to coat the biscuit pieces and pour into container.
  8. Push the whole mixture down with a spoon to compress it. If you used baking paper, you can fold that on top and press down WITH A SPOON because we don't want hot chocolate sauce burning your hands.
    The mess on the right is what happens when you press it down
                         
    (The biscuits may shift about when you do this so please don't panic if something pops out of place, just keep pressing them back down)
  9. Now chuck the container in the fridge and give yourself a pat on the shoulder.
  10. Do the chicken dance.
  11. Take a shower with your clothes on.
  12.  Change out of your wet clothes
  13. Do a twirl
  14. Now, ONLY do step 1 to 9
  15. Take cake out of the fridge when you're sure it's set (It usually takes 3-5 hours but if it doesn't seem to be setting,which usually happens to me, put it in the freezer in fact leave it over night in the fridge.)
  16. Impress yourself , enjoy your cake and gain some weight. (Weight gaining may be optional if you don't eat it that is...) 
  17. Wash up your saucepan, measuring cups and everything you used.
    DO NOT NEGLECT THIS STEP OR YOUR PARENT'S/HOUSEMATES/PEOPLE YOU LIVE WITH ARE GOING TO BE SO ANNOYED!!!
I hope you had fun :)

Asia Colion