Showing posts with label tips & tricks. Show all posts

Thursday, August 21, 2014

Funtastic Fridays - Scrumptious Scones

TGIF! 
Thank God it's Funday!
I am happy to announce that Funtastic Fridays are back!
And this week. it's....(drumrolls)...
Now, doesn't that just look scrumptious?
Scones! (ba-dam-tss!)

Here's how these babies were born!

This recipe was adapted from http://allrecipes.com/recipe/scones/

Ingredients (Listed from left to right, top to bottom)

  •  1 cup milk
  • 3 cups flour
  • 170 g unsalted butter, cubed (and kept as cold as possible, freeze it)
  • 5 teaspoons of baking powder
  • 1/2 cup of sugar
  • 1/2 teaspoon of salt (I used Himalayan rock salt, but you can use regular salt)
  • 1 egg, beaten lightly
BUT WAIT, THERE'S MORE!

Before you jump right in, here's some thing's you must should do(trust me on this one, I learnt the hard way):

1) Put what ever bowl you're using to mix in the fridge/ freezer and let it become nice and cold
  • This will help the scones rise better by keeping your mixture (especially in warm climates)
2) Freeze your butter after you've cubed them
  • Because you need to keep thing cold, so your scones rise higher
3) Preheat your oven at 200C degrees
  • Grease your baking tray or line it with baking paper
4) Clear a large enough surface for kneading the flour
  • Finally, some action!
5) Make sure your hands are clean and your fingernails trimmed
  • Obviously, for hygiene reasons. Especially trimming nails...
Let's get on with the show!

1) Place flour, sugar, baking powder and salt into the cold mixing bowl and mix till combined


2) Throw in the cubed butter and, using your hands (you can use a pastry cutter but I like using my hands) break up the butter and mix with the flour until a bread crumb texture is achieved.

Your mix should look like this (this step is totally not long nailed friendly, hence, trim them)


3) Pour milk into the beaten egg and mix till combined


4) Make a well in the mix and pour milk and egg mixture into the well. Mix until you get a gooey mess.

  • At this point you might think the gooey mess is a mistake, but DON'T PANIC! It's all part of the plan.


5) Flour your surface generously, much more generously than I did please!

Gooey mess FTW!

6) Scoop out the gooey mess onto the floured surface and knead away!


7) Feel free to add more flour as you knead and shape it into 1 and a 1/2 inch (approximate) and you're ready to cut

8) You can use a scone cutter but if you don't a straight glass will do the trick! Flour the cup thoroughly and press down into the flour to create round cuts!
  • Optional: egg wash, use a basting brush to brush on beaten egg onto the top of the  unbaked scones


9) Pop them into the oven and bake for 15-20 minutes or until golden brown. Cool on a wire rack.
Why, hello there! Nice day for a spot of tea!

10) Serve with butter and jam (and clotted cream if it's available!) And now you're done!

Once more this recipe is adapted from http://allrecipes.com/recipe/scones/
I used this recipe and made changes as I saw fit.

Enjoy!

Asia Colion

Monday, September 16, 2013

Munching Mondays- Garlic smelling hands

I really have an insane craving for mac and cheese now but I only have healthy food with me. Hence, I will have a healthy dinner TOMORROW! (Procrastinators unite!)

So, my hands smell like garlic and I find that rather yucky but at least I won't have to cut garlic for a long time. Why ?

The trick for cooking which I use to reduce my cooking time is to pre-chop my garlic and store them in cooking oil then put it in the fridge.

It's completely safe! I have been doing this for the whole of my previous semester and I did not have any stomach discomfort nor did Sienna. (My ex-roomie and the person with the lacy purple scarf)

After all you only need two things: Garlic and oil (prefably not olive because you can't heat olive oil  too much or it will be bad for your health.) I used vegetable oil(Palm oil, I think.)

How I did it?

  1. Crush and peel garlic
  2.  Chop garlic finely
  3. Put in an air tight glass jar (or clean old pasta sauce bottles)
  4. Fill jar with oil till you cover the garlic
  5. Put in fridge

As you can see the oil solidifies. This is completely normal and a good thing! Reason?
You can  now control the amount of oil you use without accidentally pouring out too much into the pan while cooking.

You also get Garlic infuse oil. How do we use it now that we have a jar full of garlic in oil? (and garlic smelling hands)

  1. Grab a spoon
  2. Scoop out the amount of oil garlic mixture
  3. Drop into warm pan 
  4. Fry garlic till golden brown
  5. Stir fry vegetable/meat
    or
  6. Put the oil  and fried garlic into a bowl and add in some soy sauce for a simple dressing


Hope you found this tip useful :)

Asia Colion


Monday, September 2, 2013

Munching Mondays - Meal planning (mp) week 1 execution!

This is going to be my first meal plan ever. Join in my quest to healthier and convenient eating. If you're too busy to do it yourself you could use mine but I eat a lot of food (especially veggies) that people dislike.

Tada! So this is my meal plan for lunches

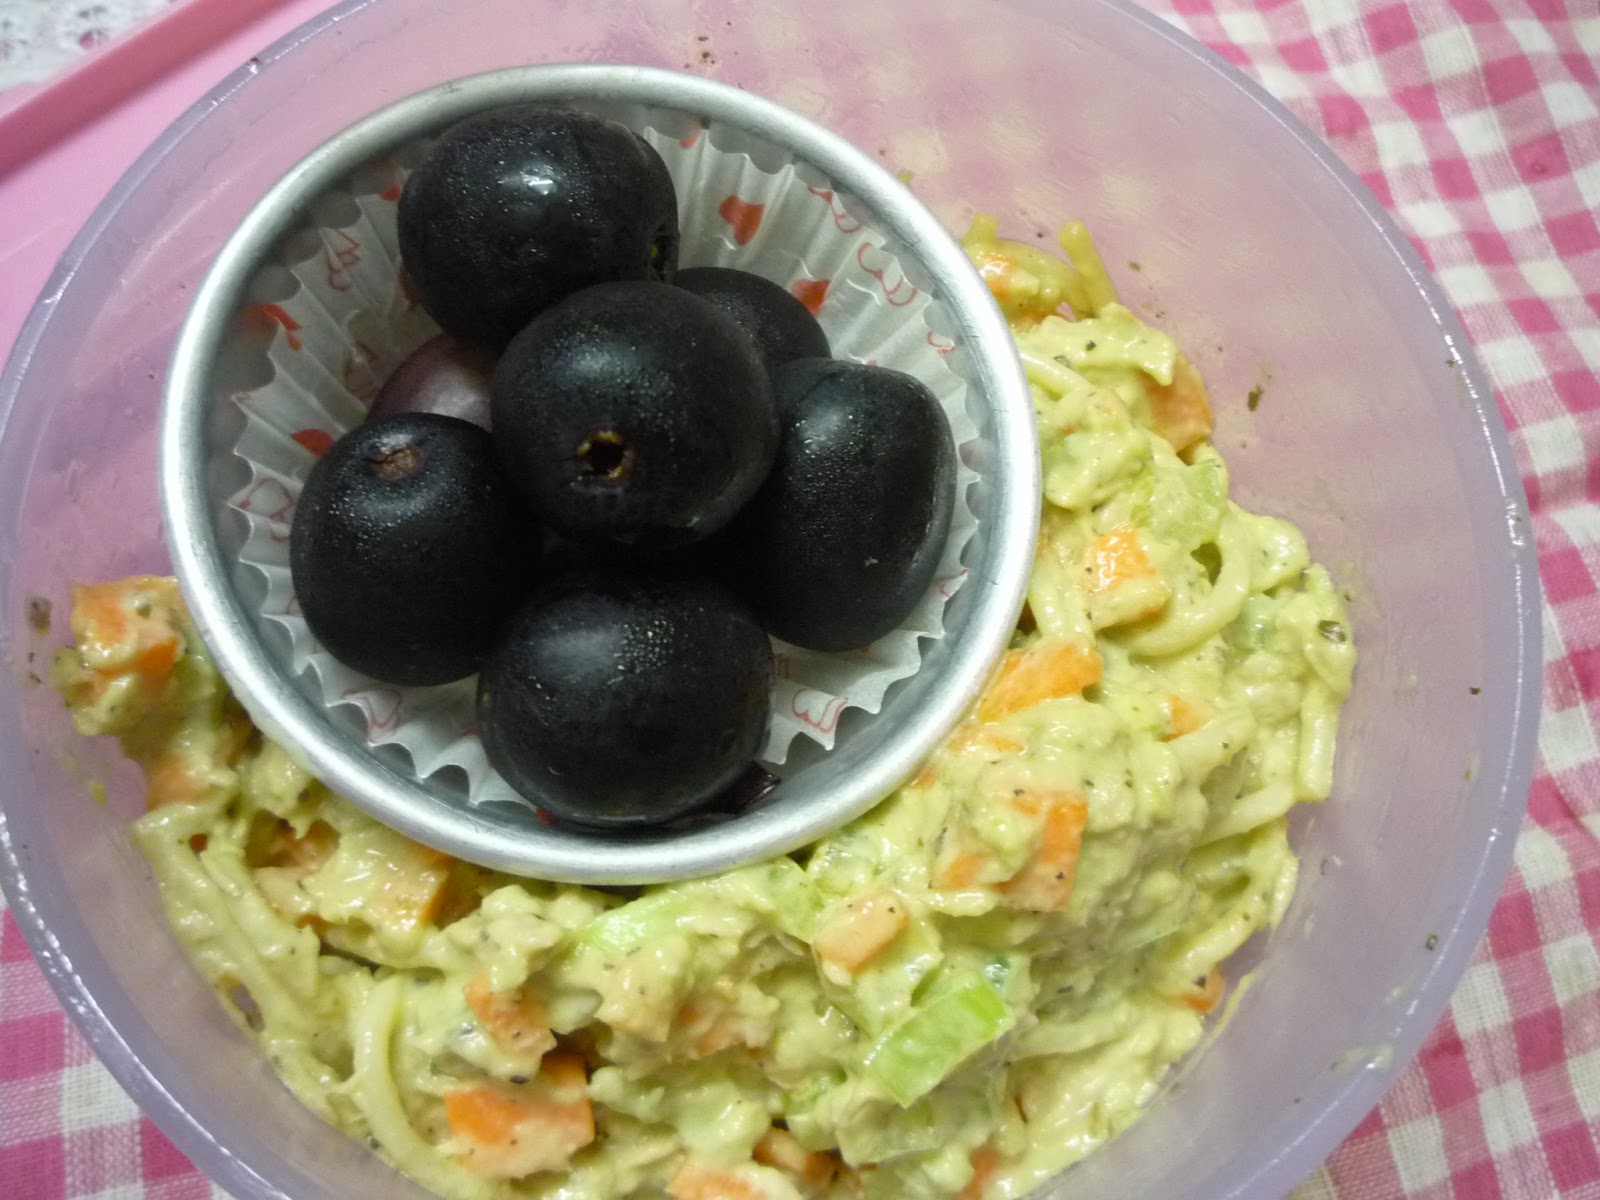
Avocado Tuna pasta salad with grapes!

And an up close
It probably doesn't look particularly nice now but I can assure you, it was really tasty. What's more, it was so easy to make! What's not to love? :)
The only hard part was waiting for lunch time to come (I prepared this before going to work) :D
Leave me a comment on how you like your pasta. See next post!

Asia Colion

Friday, August 30, 2013

Funtastic Fridays - No bake cake ( batik cake/ hedgehog slice)

Warning! This post is ultra long. Warning! This post is ultra long. Warning!

Everybody loves Friday except for everyone else who doesn't (me included). Why would anyone n dislike Fridays? Well in Malaysia, Friday is the day of terrible traffic because of several factors. 

Malaysian traffic often looks like this or worse.
Going chronologically: 
  • 'Overly happy because it's the last day  of work for the week' workers heading off to work in the morning. ( Fine, this occurs every day minus the happy part.)
  • Our Muslim friends have prayers in the afternoon = traffic jam. (You guys face the worst of it because you have to go out to pray. Sorry bout the jams :/ )
  • Friday night fever people (All you crazy happening people who go out after work to partay the night away)
So obviously for all us spoil sport people who don't like Friday jams, we need a little Friday fun! What better way to have fun than to eat a deliciously rich  and fudgy chocolate cake and decline into obesity?
This is Wendyinkk's batik cake! So pretty! You have to check out Wendyinkk's blog tutorial, it's much clearer!

 I am fully aware that some people dislike chocolate but this one's for the rest of us who do.

Making cakes = The hassle of  baking a cake and the clean up that comes with it and let's admit it, there are those cakes which turn out like an alien baby from Uranus or something. 

I've probably convincingly discouraged you from trying by now. But fear not!! This no bake batik cake/hedgehog slice  is so SIMPLE and FAIL PROOF. You will NOT end up with an alien baby from Uranus. I promise!

Okay  enough chatter and down to getting this cake in our tummies! (There are a lot of different versions of this recipe on the web, mine is reduced sweetness so it's quite bitter)

Things you need:
  1. Measuring cups (if you don't have these, using a small glass cup might work)
  2. Baking paper ( or you can grease your container with butter/margarine)
  3. Container of any shape to house your cake (usually square ones are good)
  4. Pot and stove (if you don't have this, you probably can't make this cake...)
Ingredients ( My recipe is reduced sugar ):
  1. 1 cup of water (250 ml)
  2. 1 cup of cocoa powder
  3. 1/2 to 1 cup of Milo/ drinking chocolate powder
  4. 1/2 cups of brown sugar (if you like things sweet you can use 1 cup)
  5. 125 g of butter/ margarine ( Roughly half a stick. Salted/ unsalted? Up to you.)
  6. 3 eggs
  7. 1 pkt of Marie Biscuits
Method (read to the end before doing anything):

  1. Put ingredients 1,2,3,4 in a pot on low heat. Mix until combined.
  2. Add in ingredients 5 and 6 in the same pot and stir until chocolate sauce coats your spoon. Turn heat off

    For people who want a nice even pattern or if you just have OCD and need things to be neat:
  3. Arrange a layer of Marie biscuit to cover the base of your container
  4. Pour chocolate sauce to cover the biscuits. Now add another layer of biscuits and repeat this process till you finish your chocolate sauce. 
  5. Now proceed to step 8

    Alternately, if doing step 3 and 4 is too much of a hassle for you non-OCD folks:
  6. Simply break the Marie biscuits into halves or quarters (or just break those buggers anyhow) and chuck it all into the chocolate sauce.
  7. Stir to coat the biscuit pieces and pour into container.
  8. Push the whole mixture down with a spoon to compress it. If you used baking paper, you can fold that on top and press down WITH A SPOON because we don't want hot chocolate sauce burning your hands.
    The mess on the right is what happens when you press it down
                         
    (The biscuits may shift about when you do this so please don't panic if something pops out of place, just keep pressing them back down)
  9. Now chuck the container in the fridge and give yourself a pat on the shoulder.
  10. Do the chicken dance.
  11. Take a shower with your clothes on.
  12.  Change out of your wet clothes
  13. Do a twirl
  14. Now, ONLY do step 1 to 9
  15. Take cake out of the fridge when you're sure it's set (It usually takes 3-5 hours but if it doesn't seem to be setting,which usually happens to me, put it in the freezer in fact leave it over night in the fridge.)
  16. Impress yourself , enjoy your cake and gain some weight. (Weight gaining may be optional if you don't eat it that is...) 
  17. Wash up your saucepan, measuring cups and everything you used.
    DO NOT NEGLECT THIS STEP OR YOUR PARENT'S/HOUSEMATES/PEOPLE YOU LIVE WITH ARE GOING TO BE SO ANNOYED!!!
I hope you had fun :)

Asia Colion

Sunday, August 25, 2013

Munching Mondays- Meal planning?

Choices, choices.

Remember those times when your friend asks you "What do you want to eat?" And you immediately hate them for asking you something which you yourself haven't the foggiest idea? 

When I mention "meal planning", you're probably thinking of housewife duties (no sandwich jokes please). In fact, meal planning, will help you answering that dreaded question. 
Man, go make your own sandwich.

Even more so  if you plan to prepare your own meals because if you're anything like me, you'll find yourself standing by the stove for 30 minutes and still unsure of what to cook.

So why meal planning? 

3 Benefits of meal planning
·        Saves time
o   No more standing in front of that stove for 30 minutes thinking of what to cook for dinner.
o   No more walking around the food aisle wondering which ingredient to buy
·        Saves money
o   No more finding you have to run out to Tesco/Coldstorage/Ben's/etc..)
o   No more buying ingredients which you will find in your fridge weeks later in the process of decomposing
·        Need to shed some pounds/kg?
o   Planning out what you’re going to eat within the week can help you count and cut unnecessary calories
o   Easily monitor what kinds of food we eat to maintain a balanced diet.

Still think meal planning is for sissy people? Then join me for the next blog post on my weekly meal plans to have a glimpse of the benefits without having to do the actual work yourself :D

See you next time ~

Asia Colion